
PhotoTux has two ways of changing how an image looks, and the difference matters.
- An adjustment layer sits in the stack and changes everything below it. Nothing under it is modified; hide the adjustment and the original is back.
- A filter is attached to one layer as an entry in that layer’s filter plan. It is re-editable and reorderable, and the layer’s own pixels are left alone until you flatten or rasterize.
Neither is destructive while the document is open in .ptx form. Both become
permanent when you flatten or export.
Adjustment layers
Layer ▸ New Adjustment Layer offers ten:
| Adjustment | What it does |
|---|---|
| Brightness/Contrast | The two blunt controls. Good for a quick lift. |
| Levels | Black point, white point and gamma. The right tool for setting the ends of the tonal range. |
| Exposure | Scales linear light, the way a stop of exposure does on a camera. |
| Hue/Saturation | Rotates hue, and scales saturation and lightness. |
| Vibrance | Saturation that leans on the muted colours and leaves the already-saturated ones alone. |
| Black & White | A controllable monochrome conversion, rather than dropping saturation to zero. |
| White Balance | Corrects a colour cast by naming what should have been neutral. |
| Threshold | Everything above a level becomes white, everything below it black. |
| Posterize | Reduces the number of levels per channel. |
| Invert | Inverts the composite below. No parameters. |
Each arrives as a layer with an A badge, and its controls appear in the Properties panel. Change them at any point; the change is a history step like any other.
To adjust one layer rather than everything below it, put the adjustment directly above the layer and use Layer ▸ Create Clipping Mask. The adjustment then applies only to the layer it is clipped to.
The order of adjustments matters
Adjustments compose bottom to top, so a Levels under a Hue/Saturation is a different picture from a Hue/Saturation under a Levels. Drag them in the Layers panel to reorder.
Filters
Filter in the menu bar lists thirteen effects, and each is also reachable from the gallery.
| Filter | What it does |
|---|---|
| Gaussian Blur | The standard soft blur. One radius. |
| Box Blur | A cheaper blur with a squarer falloff. |
| Motion Blur | Blur along an angle, as if the camera moved. |
| Zoom Blur | Blur radiating from a centre point. |
| Sharpen | Increases local contrast at edges. |
| Unsharp Mask | Sharpening with amount, radius and threshold, so you can sharpen edges without amplifying noise. |
| High Pass | Keeps only the fine detail, discarding the broad tones. Used with Overlay or Soft Light for sharpening. |
| Clarity | Midtone local contrast. |
| Denoise | Reduces sensor noise. |
| Emboss | Turns edges into a raised relief. |
| Add Noise | Adds grain, for matching a noisy plate or breaking up banding. |
| Offset | Shifts pixels, wrapping at the edges. Used for making a texture tile. |
| Invert | Inverts this layer’s pixels — as a filter rather than an adjustment layer. |
The filter gallery
Filter ▸ Filter Gallery opens a preview that draws on the canvas without touching the document.
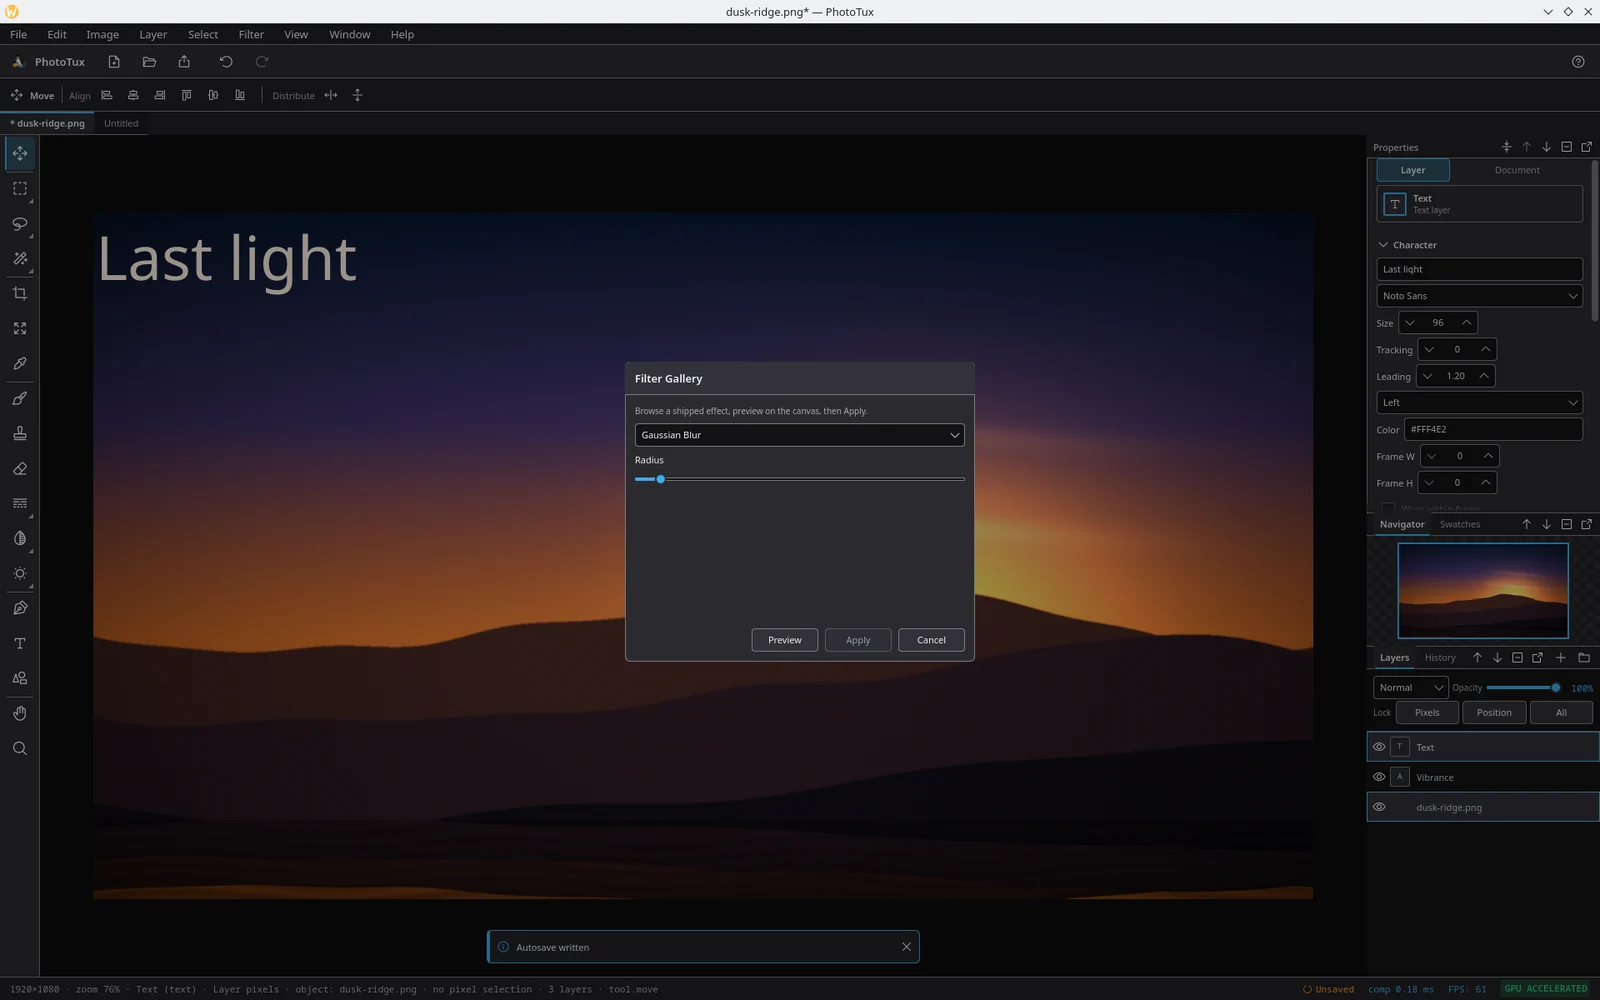
- Pick an effect from the list.
- Move its sliders — the canvas updates live.
- Preview refreshes if you have changed the document underneath.
- Apply commits it into the layer’s filter plan as one undo step.
- Cancel throws it away and leaves the document exactly as it was.
While the gallery is open, the document is not marked as changed. Nothing is committed until you press Apply, and a preview that has gone stale — because the layer stack moved while the dialog was open — is refused rather than applied to the wrong thing.
The filter plan
Every layer carries an ordered list of the filters applied to it. From the Properties panel you can:
- Reorder them — a blur before a sharpen is not the same picture as a sharpen before a blur.
- Disable one without removing it, to compare.
- Edit its parameters at any time.
- Remove one.
The plan is stored in the .ptx document, so it survives a save and reopen.
Exporting to PNG or JPEG flattens it, as does Flatten Image.
Colour management
Colour handling lives under Image ▸ Color:
- Assign Profile tags the document as being in a colour space, without changing any numbers.
- Convert to changes the numbers so the image looks the same in the new space.
- Soft-Proof shows what the document will look like through a chosen output profile, without changing it.
- Embed ICC Profile… writes a profile file into the document, and Clear Embedded ICC removes it.
sRGB and Display-P3 are built in. Profile bytes are validated before they are embedded, so a corrupt file is refused rather than written into your document.